
Spring Boot is a module that provides RAD (Rapid Application Development) feature to the Spring framework. Spring boot is highly dependent on the starter templates and auto-connfiguration features that are very powerful and they work flawlessly.
1. Spring Boot Starter Template
Spring Boot starters are templates that contain a collection of all the relevant transitive dependencies that are needed to start a particular functionality.
For example, If we want to create a Spring Web application then in a traditional setup, we would have included all required dependencies ourselves. It leaves the chances of version conflicts which ultimately result in more runtime exceptions.
With Spring boot, to create such an application, all we need to import is spring-boot-starter-web dependency which internally imports all the required dependencies and adds to the project.
<!-- Parent pom is mandatory to control versions of child dependencies --><parent> <groupId>org.springframework.boot</groupId> <artifactId>spring-boot-starter-parent</artifactId> <version>2.5.3.RELEASE</version> <relativePath /></parent><!-- Spring web brings all required dependencies to build web application. --><dependency> <groupId>org.springframework.boot</groupId> <artifactId>spring-boot-starter-web</artifactId></dependency> |
Note that some dependencies are directly included, while some dependencies further refer to other starter templates which transitively downloads more dependencies.
Also, notice that we do not need to provide version information into child dependencies. All versions are resolved in relation to version of parent starter (in our example it’s 2.5.3.RELEASE).
<dependencies> <dependency> <groupId>org.springframework.boot</groupId> <artifactId>spring-boot-starter</artifactId> </dependency> <dependency> <groupId>org.springframework.boot</groupId> <artifactId>spring-boot-starter-json</artifactId> </dependency> <dependency> <groupId>org.springframework.boot</groupId> <artifactId>spring-boot-starter-tomcat</artifactId> </dependency> <dependency> <groupId>org.hibernate.validator</groupId> <artifactId>hibernate-validator</artifactId> </dependency> <dependency> <groupId>org.springframework</groupId> <artifactId>spring-web</artifactId> </dependency> <dependency> <groupId>org.springframework</groupId> <artifactId>spring-webmvc</artifactId> </dependency></dependencies> |
Read More : Spring boot starter templates list
2. Spring Boot Auto-Configuration
Spring boot auto-configuration scans the classpath, finds the libraries in the classpath, and then attempts to guess the best configuration for them, and finally configure all such beans.
Auto-configuration tries to be as intelligent as possible and will back away as we define more of our own configuration. Auto-configuration is enabled with @EnableAutoConfiguration annotation.
Auto-configuration is always applied after user-defined beans have been registered.
Spring boot auto-configuration logic is implemented in spring-boot-autoconfigure.jar and works on top of @Conditional, @ConditionalOnClass and @ConditionalOnProperty annotations.
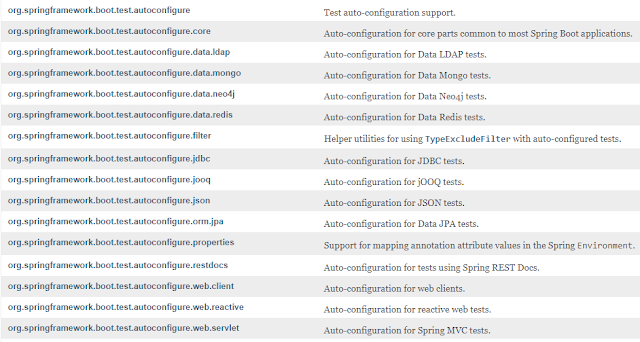
Spring boot autoconfiguration packages
For example, look at auto-configuration for Spring AOP. It does the following-
- Scan classpath to see if
EnableAspectJAutoProxy,Aspect,AdviceandAnnotatedElementclasses are present. - If classes are not present, no autoconfiguration will be made for Spring AOP.
- If classes are found then AOP is configured with Java config annotation
@EnableAspectJAutoProxy. - It checks for property
spring.aopwhich value can betrueorfalse. - Based on the value of property,
proxyTargetClassattribute is set.
@Configuration@ConditionalOnClass({ EnableAspectJAutoProxy.class, Aspect.class, Advice.class, AnnotatedElement.class })@ConditionalOnProperty(prefix = "spring.aop", name = "auto", havingValue = "true", matchIfMissing = true)public class AopAutoConfiguration { @Configuration @EnableAspectJAutoProxy(proxyTargetClass = false) @ConditionalOnProperty(prefix = "spring.aop", name = "proxy-target-class", havingValue = "false", matchIfMissing = false) public static class JdkDynamicAutoProxyConfiguration { } @Configuration @EnableAspectJAutoProxy(proxyTargetClass = true) @ConditionalOnProperty(prefix = "spring.aop", name = "proxy-target-class", havingValue = "true", matchIfMissing = true) public static class CglibAutoProxyConfiguration { }} |
3. Embedded Servers
Spring boot applications always include tomcat as default embedded server. It enables us to run any Spring boot application from the command prompt without including any complex server infrastructure.
We can exclude Tomcat and include any other embedded server if we want, e.g. Jetty Server. Or we can make exclude the server environment altogether. It’s all configuration-based.
For example, below configuration excludes Tomcat and includes Jetty as embedded server.
<dependency> <groupId>org.springframework.boot</groupId> <artifactId>spring-boot-starter-web</artifactId> <exclusions> <exclusion> <groupId>org.springframework.boot</groupId> <artifactId>spring-boot-starter-tomcat</artifactId> </exclusion> </exclusions></dependency><dependency> <groupId>org.springframework.boot</groupId> <artifactId>spring-boot-starter-jetty</artifactId></dependency> |
4. Bootstrapping the Application
To run spring boot application, we need to use @SpringBootApplication annotation. Behind the scenes, that’s equivalent to @Configuration, @EnableAutoConfiguration, and @ComponentScan together.
@SpringBootApplication enables the scanning of config classes, files and load them into spring context. In below example, the program execution start with main() method.
When we run the application, auto-configuration feature starts loading all the configuration files, configure them and bootstrap the application based on application properties in application.properties file in /resources folder.
@SpringBootApplicationpublic class MyApplication { public static void main(String[] args) { SpringApplication.run(Application.class, args); }} |
### Server port #########server.port=8080 ### Context root ########server.contextPath=/home |
To execute the application, we can run the main() method from an IDE such as eclipse, or we can build the jar file and execute it from the command prompt.
$ java -jar spring-boot-demo.jar |
5. Advantages of Spring Boot
- Spring boot helps in resolving dependency conflict. It identifies required dependencies and import them for you.
- Spring boot has information of compatible version for all dependencies. It minimizes the runtime classloader issues.
- Spring boot’s “opinionated defaults configuration” approach helps in configuring most important pieces behind the scene. Override them only when you need. Otherwise everything just works, perfectly. It helps in avoiding boilerplate code, annotations and XML configurations.
- Spring boot provides embedded HTTP server Tomcat so that you can develop and test quickly.
- Spring boot has excellent integration with IDEs like eclipse and intelliJ idea.
No comments:
Post a Comment
Note: only a member of this blog may post a comment.